I have always wanted an ice cream maker. A few years ago I did some research and found this gem from White Mountain. It is electric as well as hand-cranked. I love Homemade Ice Cream. As a child, we would make homemade ice cream all the time. We did not have an electric ice cream maker. It was the old fashioned hand crank ice cream maker and all the kids had a turn cranking. We didn’t mind, we waited in anticipation for the yummy results.
White Mountain – The original old-fashioned ice cream maker For more information on this ice cream maker go to http://www.whitemountainproducts.com or call 1-800-343-006
Making Ice Cream At The Cottage
Who can resist homemade ice cream at the cottage on a hot sweltering day? It is one of my favorite things to do with my grandchildren. Of course, having little hands help, makes it all the more enjoyable. They are so eager to learn
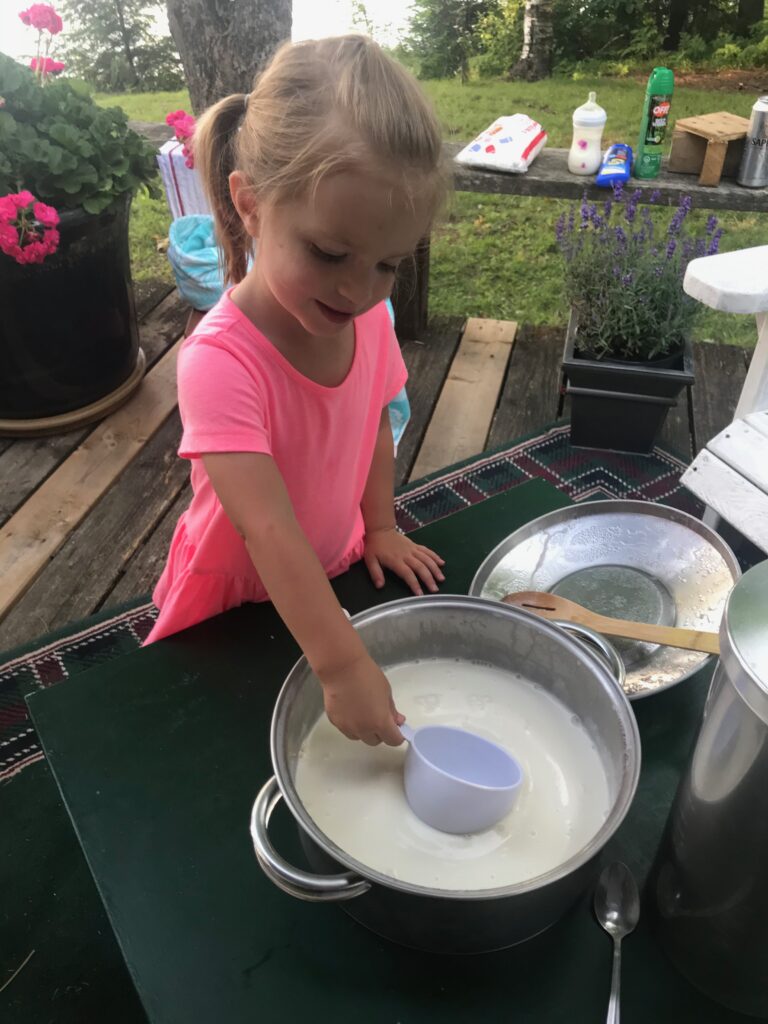
Scald milk (on medium heat) stirring constantly until bubbles form around edge. Remove from heat.
Add sugar and salt. Stir until dissolved.
Stir in Half and Half, Vanilla, and whipping cream.
Cover and refrigerate 30 Minutes.
Variations:
Strawberry: Add pureed strawberries (4 cups for 4 QT recipe) chill mixture before freezing
Peach: Add pureed peaches (4 cups for a 4 QT recipe) Chill mixture before freezing
Candy Supreme: Add your favorite chocolate candy during the last 5 to 10 minutes of mixing (1 cup for 4 QT recipe)
There are many more variations and recipes for Homemade ice-cream and you can create your own. I love Mango, so I just puree mangos and add to the mixture. Be creative and tryyour favorite. Everything in the homemade ice-cream is delicious!
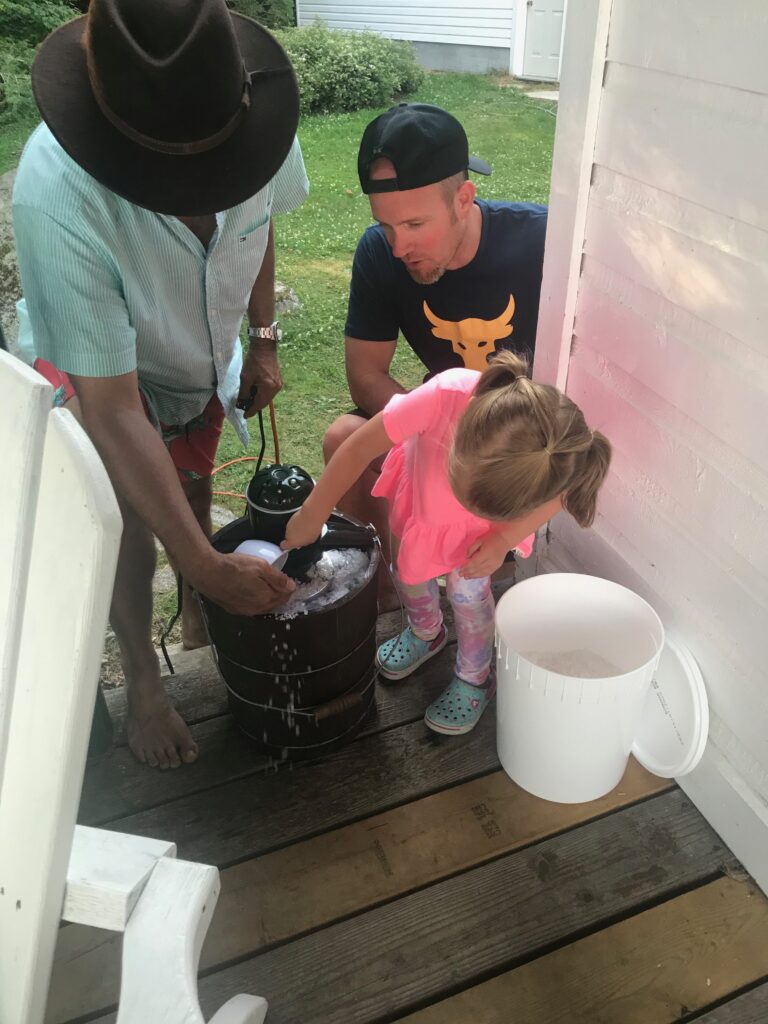
Adding The Ice and Salt With A Little Help
Adding salt to the ice cream maker, with adult supervision of course
Pull out your ice cream maker and follow the instructions for making the ice cream.
You will need 2 bags of ice and rock salt (approximately 6 cups). I like to add some ice then two cups of rock salt and repeat with ice and rock salt until it covers the canister that the ice cream mixture is in. Layering the ice and rock salt will speed up the freezing of the ice cream.
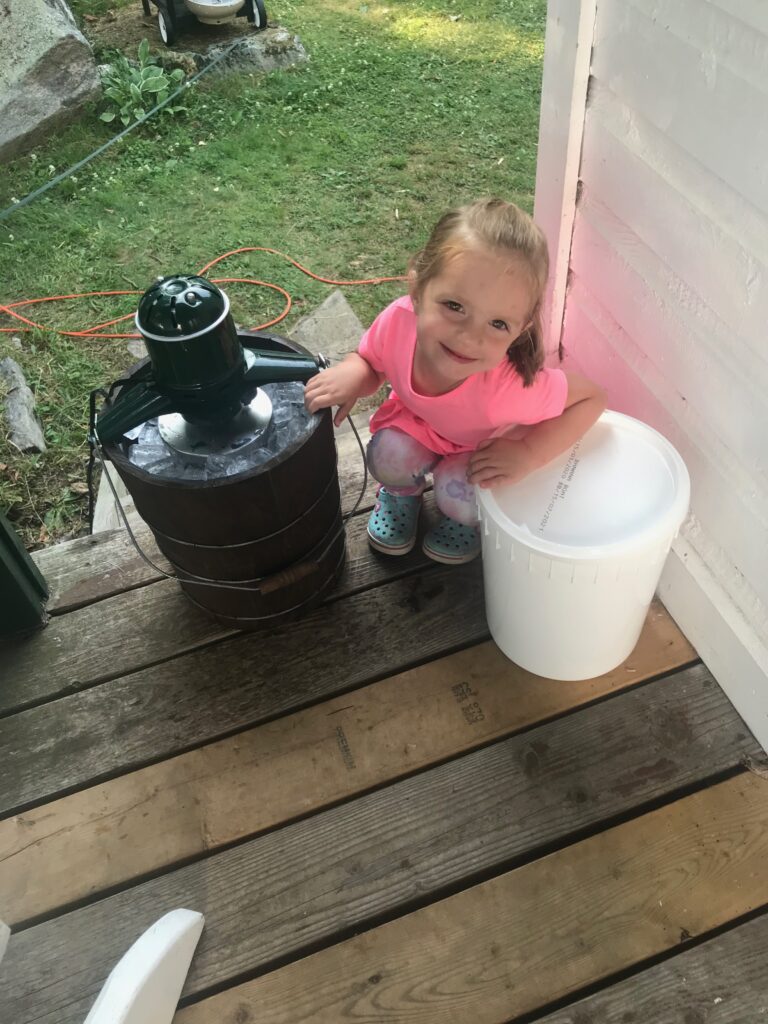
My ice cream maker took about 25- 30 minutes for it to freeze. You are now ready to eat the ice cream or pack it for a harder consistency.
Watching and waiting Patiently
Could not ask for a cuter supervisor
Is it ready yet nanny? It has been a long time (10 min). I am keeping watch. Let’s check it.
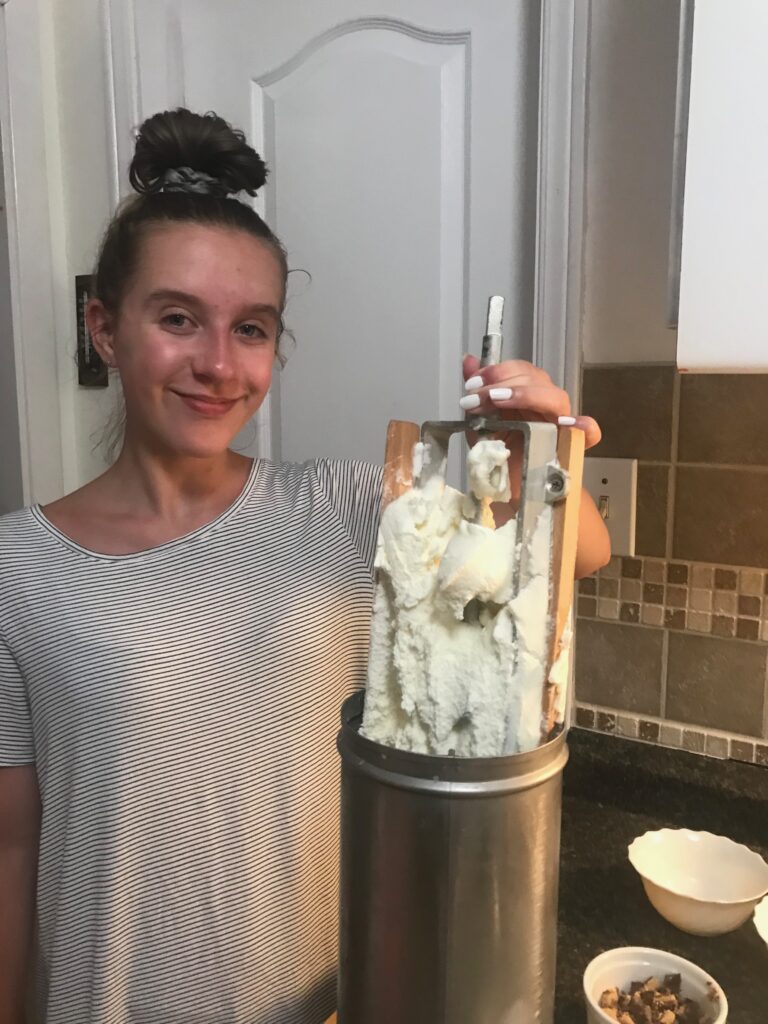
The Finished Product is Now Ready!
What we have patiently been waiting for – the finished product
This is what the churned ice cream looks like when ready. Scrape it into a bowl making sure you get every bit from around the dasher. All ready to eat. Now let’s get the topping, bowls, and spoons out.
OK, WHAT ARE YOU WAITING FOR – LET’S DIG IN
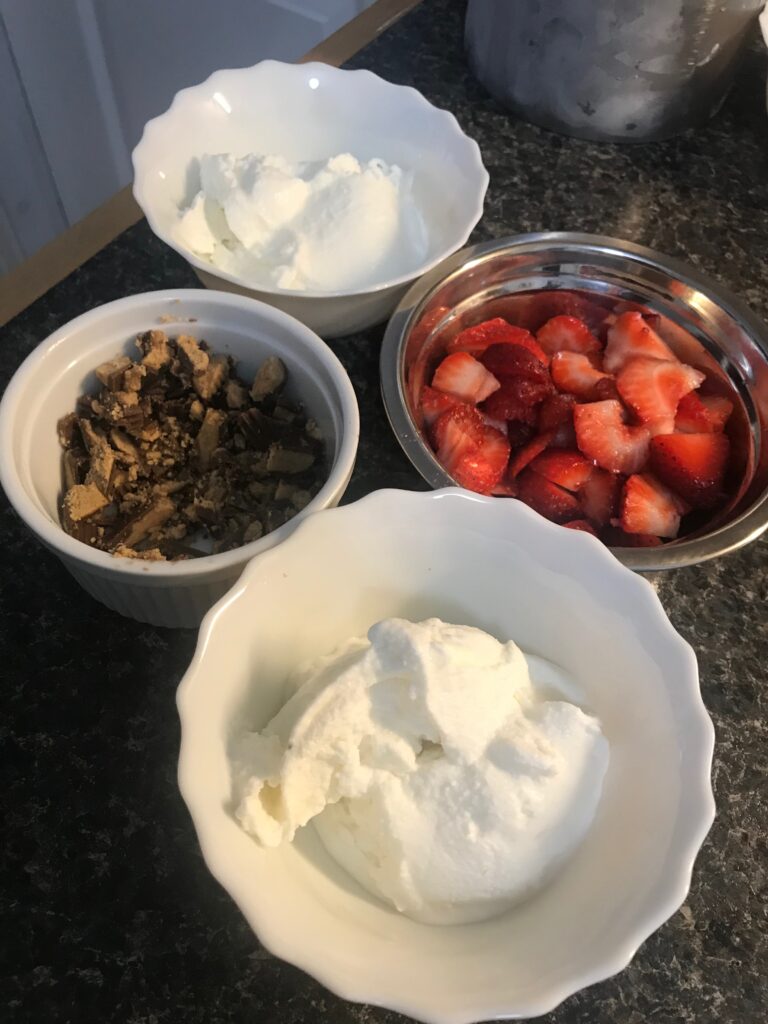
Yummy, can’t wait to dig in – just need to choose our toppings
You can add whatever topping you like to the basic vanilla recipe. We cut up peanut butter cups and diced strawberries. It was delicious! Get creative and mix it up. Pretend you are at your favorite ice cream shop and add a variety of toppings. The kids like this part. Go to the bulk barn and make it an adventure. Let everyone choose 3 of their favorite toppings. Of course, mom and dad can add healthy things like fruit & nuts to the mix.
Please leave a comment and share your favorite ice cream recipe and toppings with me.
About Me
“Eat.Live.Design is where you connect with ideas for living a better life"
Hi, I’m Bev, I love sharing my home renovation projects, delicious recipes and lifestyle tips. I have dedicated hundreds of hours to researching all of my passions. My ultimate goal is to share this valuable information with all of you to take the guesswork out of your projects and help make your lives easier.


